
In this article:
Activate personalized files function
Note:
This module is an additional function that is not available in the basic setup of evenito. Please get in touch with your sales contact or the Customer Success Team if you are interested in this function and would like more information on how to activate it.
Create your personalized file
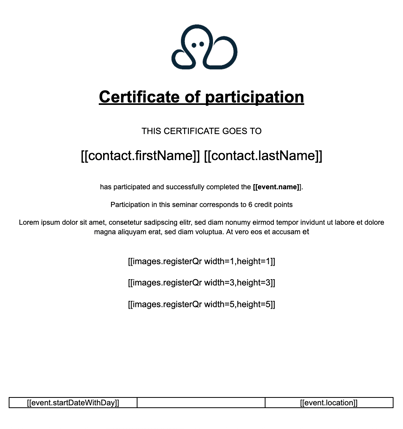
Before you can personalise your file, you must first create a document. For this purpose, you set up a Word file in which you insert your texts, images, logos, etc. and specify the desired format.
In order to be able to personalize this document through our letter shop, you now need to add the correct placeholders, which are automatically filled with the participant's personal information when the file is downloaded and dispatched. These placeholders can be used, for example, to design an address field, insert the salutation or generate a QR code.
If desired, tables can be used in the files to bring structure to the document. It's also possible to hide table rows so that they are not displayed in the final document.
Please note:
Your document must be created in the same format in which you want to print it in the end.
Only the basic fonts, such as Arial, should be used to create the Word file. The personalized files cannot reproduce every font, otherwise it will be automatically adjusted to a basic font in the background.
Please also note that the placeholders in a file will not work if you embed them in the header, footer or a text field, for example.
How to use the file
As soon as you have prepared your file, you can add it to your event.
To do this, go to the "Content" menu item in the navigation bar, select "Personalized Files" and click on the "+" symbol on the right-hand side.

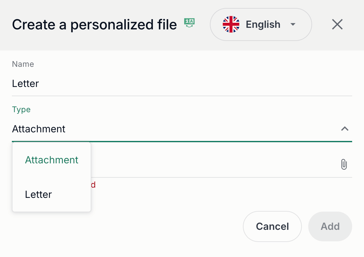
Next, you define the name of your file, add it via the file manager by clicking on the paper clip icon and confirm the upload via the "Add" button. You can choose different types for your file in the dropdown, depending on what you will use the file for. You can choose between Attachment and Letter.
Please note:
If you have also booked the additional feature "Badge Printing", you are also able to choose the type "Badge" here in the dropdown.
Please note:
In case your event is multilingual, you can save the files in different languages via the language switcher in the top right hand corner. As soon as you download or send the file to your contacts, they will automatically receive the file in the language stored in the contact.
Download
Download from the contact view
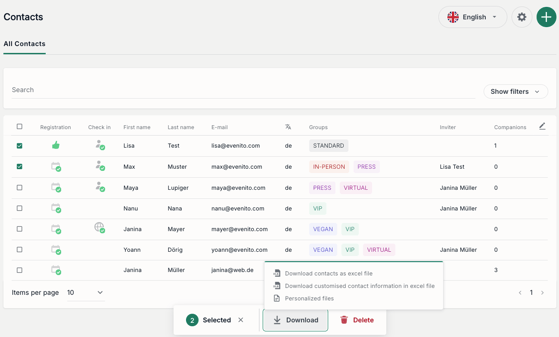
To download your personalized file, navigate to your contacts and select the participants you want to download by selecting the respective checkbox. After selecting your contacts, click on download in the floating menu, that shows on the lower part of the page and select "Personalized files".
Please note:
You are also able to select individual contacts in the list via different pages.
Next, the following window opens, where you select your file: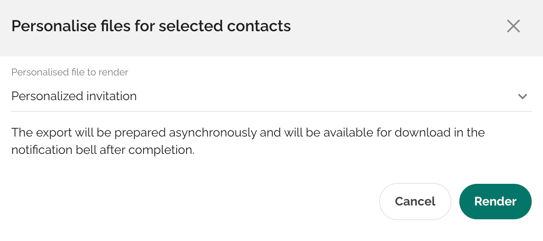
By clicking the "Render" button you confirm the export of the personalized files. The download is prepared with a time delay and the duration depends on the size and number of files and contacts selected. As soon as the download is ready, you will be informed in the notification bell and can download the file.
Download for individual participants
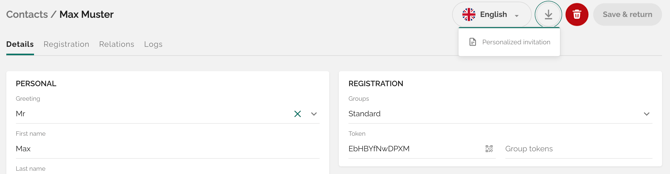
You also have the option of downloading the personalized file for a single contact. To do this, open the relevant contact by hovering over the contact with the cursor and clicking on the edit pencil on the right hand side. Then click on the download button at the top right and select the file to trigger the download.
Dispatch
Linking files in a message
To send the file to your participants via message, you must first create a message in which you want to send out your file.
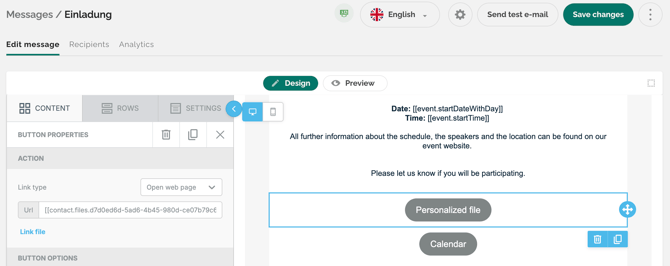
Insert a button in the message for the link to the file and store the placeholder of the file in the URL.
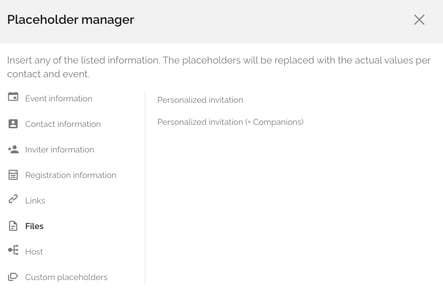
In the placeholder manager, under the "Files" section, you'll find the corresponding placeholders for the file. There are two different options available. The first placeholder (here, for example, "Personalized invitation") pertains to the personalized file of the main contact. The second placeholder (+ Companions) automatically includes both files, meaning that the personalized files for both contacts (main contact + companion) are included.
After you have completed your message, you can now send your message to the contacts you have selected.
If the placeholder "File name" (+ Companions) is used in a message, the file can only be provided after the regular dispatch. No file is provided if the message is sent as a test message.
Please note:
If multiple files need to be rendered, a notification will appear indicating that the document is being prepared. The page will then need to be refreshed in order to access the complete document. After refreshing, the document will be available immediately.
Please also note that the document will only be available for 7 days after the message is sent. If the recipient does not download the file within this timeframe, the link will expire and the message will need to be resent.
Attaching files to a message
To send your personalized file as a PDF to your participants via messages, you must first create a message in which you want to send out your file and also create the personalized file with the type "Attachment". For the steps on how you can create a personalized file with the type "Attachment", please refer to this part of the article.
After these steps are done, go to your message and open the message settings via the gear wheel in the upper part of the page. Locate the "Attachments" section on the right hand side, and click on the plus button to attach your file.
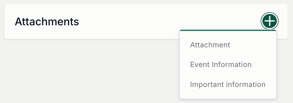
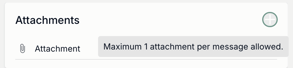
Afterwards you can choose your desired attachment from the dropdown menu that will open. You currently have the option of attaching one file per message and the plus button will be greyed out after you've attached a file.
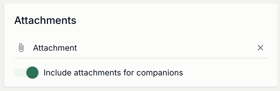
If the main guest has companions and the main guest should also receive the companion's file, you can enable the "Include attachments for companions" checkbox to bundle all files in one message.
Please note:
Please ensure that your attached file is under 250kb in size. Otherwise you will be unable to upload your file to the message and this way you can ensure the email deliverability.
After you made sure that the correct file is attached, you can proceed with the dispatch of the message to your contacts. More on that topic can be found in this article.
Placeholders in personalized files
You also have the option of using all the contact information fields and additional questions created for your registration form as placeholders in your personalised file. You can find them in your placeholder manager under "Contact information".
If you would like to use the QR code for the Scan Agent app in a file, you will find the placeholder in this article.
You can use the following placeholders in your Word document:
- Event start date:
[[event.startDateWithDay]]
- Event start time:
[[event.startTime]]
- Event name:
[[event.name]]
- Event description:
[[event.description]]
- Main location of the event (name and adress):
[[event.location]]
- Salutation:
[[contact.greeting]]
- Title:
[[contact.title]]
- First name:
[[contact.firstName]]
- Last name:
[[contact.lastName]]
- Adress:
[[contact.address]]
- Postcode:
[[contact.zip]]
- Place:
[[contact.city]]
- Individual token:
[[contact.token]]
- QR-Code for Check-In:
[[images.qrcode]]
- QR-Code for the personalized registration on the event website:
[[images.registerQr]]
- QR-Code for the personalized access to the virtual platform:
[[images.connectUrlQr]]
Please note:
Vary the size of your QR codes by choosing between the following height and width variants (using the example of the QR code for personal registration on the event website):
[[images.registerQr width=1,height=1]]
[[images.registerQr width=3,height=3]]
[[images.registerQr width=5,height=5]]
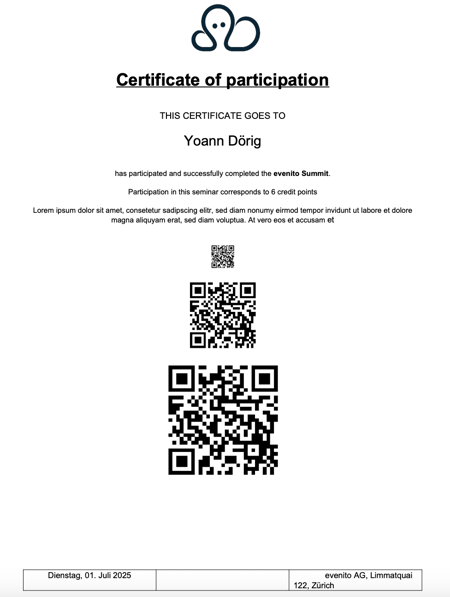
In addition to the above-mentioned dimensions, you can also choose your own sizes (e.g. width=4,height=4).