
After you have created your e-mail and sent yourself a test message, the next step is to select your recipients.
To do this, you can either click on the paper airplane icon on the right in the overview or click on the "Select contacts" button in the e-mail to be sent.
Select contacts
This window lists all the contacts that you have imported.
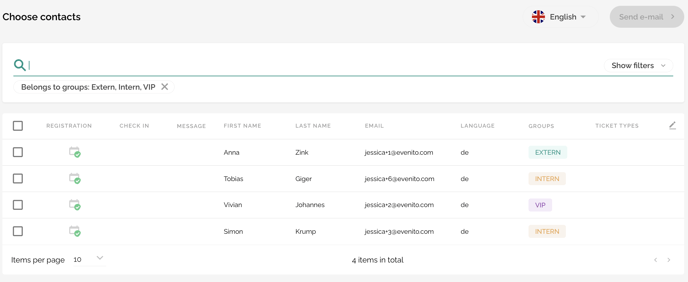
In this view, the following settings are available to you:
The search field allows you to search for a specific participant. To do this, enter either the first or last name or the e-mail address.
You can further specify your selection via "Show filters".
- The field search allows you to search explicitly for the fields you have defined, e.g. the language. You can regulate the selection of fields via the drop down menu.
- With the help of "belongs to the groups" you can select your desired group(s) accordingly.
- Using the drop down behind "belongs to the groups" you can also define to what extent this contact must belong to the group:
- one of the groups
- all of the groups
- exact match
- For example, you want to filter only the contacts who have not yet registered for your event or you would like to send the access data to your online event to all registered participants? Then filter in the drop down of the registration status, e.g. "pending" or "registered".
- Your event was held successfully and you would like to send a thank you e-mail to all participants who attended your event? Then filter for the particular status in the drop down "Check-in state".
- You would like to send an invitation to all latecomers who have not yet received one? Then filter the message state to "Not sent".
Please note:
After sending your communication, you can get a dispatch statistics export. Alternatively, you have the option of filtering by different statuses in the drop down "Message state" to filter by different statuses, e.g. by sent, delivered, soft bounce, hard bounce, queued.
If you click on "Hide filters", your selected filters will remain in the background and will be displayed as keywords
Furthermore, the "Items per page" function on the bottom left hand corner allows you to specify, which number of participants is displayed per page.
You have defined all settings? Then select your desired contacts. There are two options available to you:
- Select all contacts at once: Click on the free standing checkbox on the far left in the navigation above your contacts.
![]()
- Define only individual persons: To do this, select the respective checkbox in front of the desired contacts.

Once you have selected all the participants, click on the button "Send e-mail" at the top right corner.
Next step: Security query before final message sending