
Requirements
Before you start, make sure that the following points are met:
- The Tickets and/or Hospitality module must be fully set up in your space and activated in the event.
Configure your tickets and external tickets
First, create your ticket types under "Tickets" > "Ticket types" as described in this article. Then, click on the desired ticket, open the "Ticket Files" tab, and click the "Upload ticket files" button.
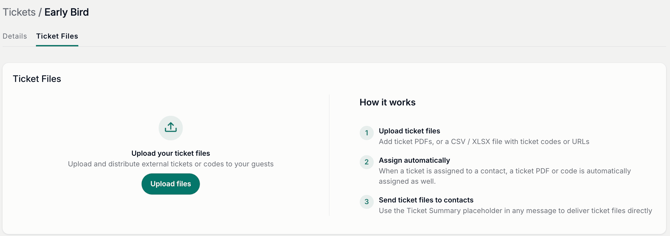
In the next step, select whether you want to upload "Codes" or "PDFs".
Create ticket codes
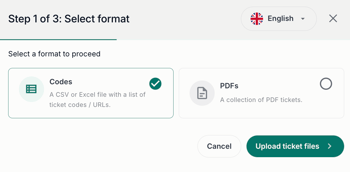
- Step 1: Select the format "Codes". Move on to step two by clicking the "Upload ticket files" button.
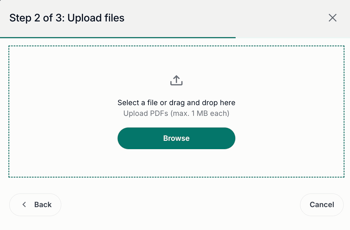
- Step 2: Drag and drop your Excel or CSV file into the pop-up window or select your file via the "Browse" button.
- Step 3: Now link the column with the individual codes from your table with the "Code" field in the upload window by selecting it from the drop-down menu and confirm your action with the "Submit" button.
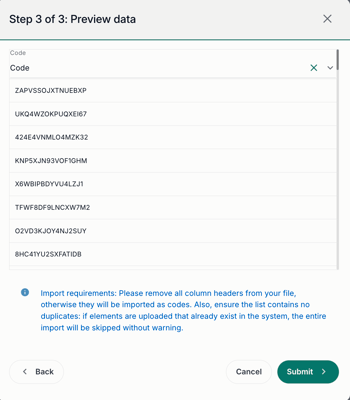
Please note:
- You can link a maximum of one column with the "Code" field per upload.
- Remove all column headers from your file.
- Empty or duplicate codes cannot be imported.
- The code character strings are limited to 500 characters.
After a successful upload, you will receive a notification at the bottom right of the window as well as in the notification bell in your navigation.
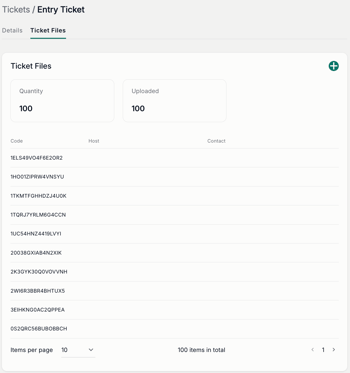
How you can edit and delete already created ticket files can be found here.
Create ticket PDFs
- Step 1: Select the format "PDFs". Click the "Upload ticket files" button to proceed.
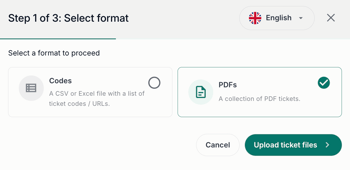
- Step 2: Drag and drop your PDF files into the pop-up window or select your files via the "Browse" button.
- Step 3: All PDF files you have selected will be loaded into the upload window. If a file is faulty, it will be excluded from the upload and marked accordingly. Confirm the upload of the PDFs with the "Done" button.
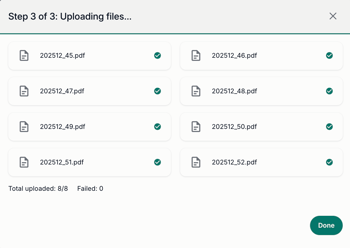
Please note:
- File size: Individual PDF files must not exceed a maximum of 1 MB.
- Each PDF must be uploaded as its own file. Multiple PDFs bundled into one PDF file will result in only a single Ticket PDF being uploaded.
After a successful upload, you will receive a notification at the bottom right of the window as well as in the notification bell in your navigation.
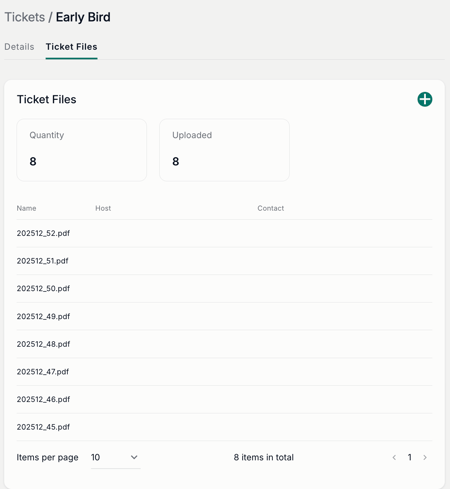
How you can edit and delete already created ticket files can be found here.
Assigning external tickets (Codes & PDFs)
When a ticket file is uploaded under a specific ticket, it is automatically assigned to the contact upon purchase or during manual assignment by a host or event manager. Managing available ticket files is done directly within the respective ticket settings.
Learn how ticket purchases work and how ticket assignment is handled via Hospitality Management in the respective articles.
You can find all distributed ticket files in the corresponding contact details in the "Registration" box on the right.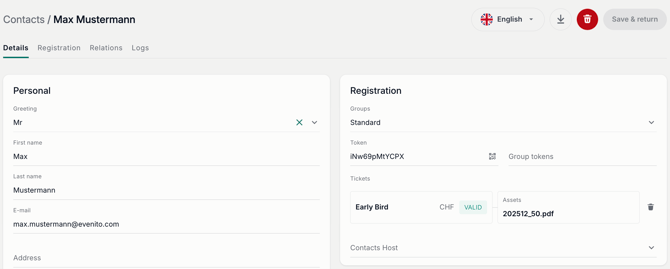
Attention!
- The ticket files will be assigned to your contacts randomly.
-
Contacts who bought a ticket or were assigned one by a host before the link was created will not automatically be allocated a ticket file.
-
A host does not automatically see that an ticket file is being distributed to this contact during this step when assigning tickets.
Manage external tickets
Uploaded ticket files can be edited and managed at will throughout the entire process.
Remove ticket files from a contact
To remove a free or manually assigned ticket (including its ticket file) assigned by a host or event manager from a contact, open the contact details of the respective contact. In the "Registration" section on the right, hover over the attached ticket file and click the trash icon. The ticket file will now be released and will be allocated to a new contact upon the next assignment action.
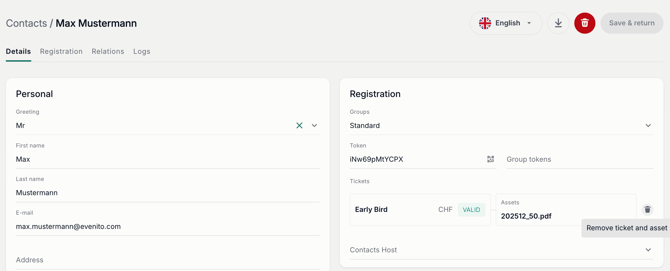
Please note:
If it is a ticket paid for via the evenito ticket shop, you can no longer remove an automatically assigned ticket file from the contact overview.
In this case, please delete the corresponding ticket file directly from the ticket and upload it again for redistribution, as described below.
Edit and delete ticket files
To view, expand, or delete your ticket files, open the the "Ticket Files" tab within a ticket.
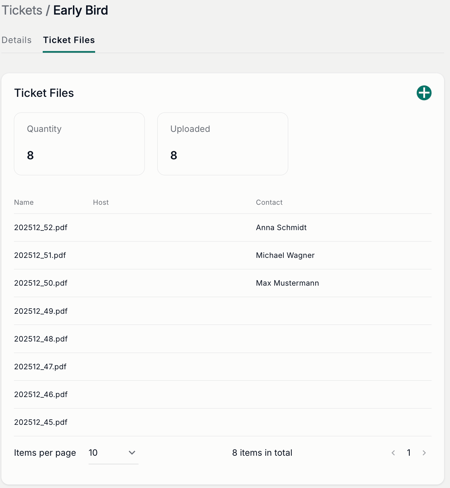
Here you will find all created ticket files with the corresponding information on how many of your total ticket files have already been assigned and how many are still available for allocation to your contacts.
In the "Contact" column, you will find a general overview of which ticket files have been assigned to which contacts.
Please note:
If the contact is also assigned to a specific host in a Hospitality Event, this will also be displayed to you in the overview.
To add more codes or PDFs to an existing ticket, click on the plus button on the top right.
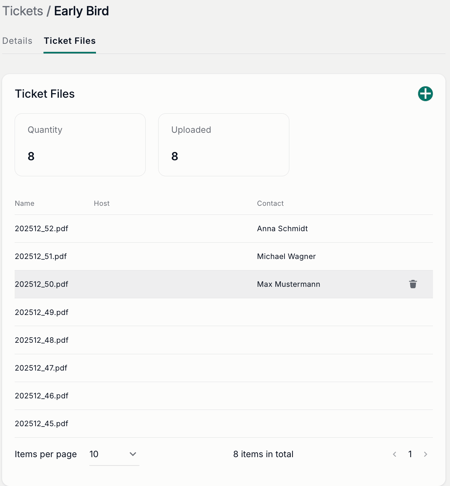
To delete an individual ticket file, hover over it with the cursor and click on the trash can icon on the far right of the respective row. If this ticket file is already assigned to a contact, it will also be removed from the contact details accordingly and the contact will lose this ticket file.
Send Ticket Files
You can easily send your uploaded ticket files (both codes/URLs and PDF files) automatically in your messages using the placeholder [[contact.tickets]].
To do this, insert the "Ticket summary" placeholder from "Registration details" in the Placeholder Manager at the desired location in the message editor. The system will then automatically adapt the output in the e-mail for each contact:
- Code & URL tickets: Rendered directly as text in the e-mail body at the location of the placeholder.
- PDF tickets: Automatically attached to the e-mail as a file. Additionally, the file name is listed in the email body at the placeholder location.
Tip:
Add the placeholder [[contact.tickets]] directly to your automatic ticket purchase confirmation or, for hospitality events, to your registration confirmation. Since ticket files are assigned to the contact as soon as a ticket is selected or allocated, they are immediately linked and sent right away.
Check messages
-
To verify that the placeholder works correctly, use the message preview or send a test e-mail.
Please note:
PDF attachments are only triggered via the actual message dispatch. No PDF is attached in the preview and test dispatch of a message.