
Create an individual greeting for your guests and enable them to deregister directly from your event or to open the registration form with one click.
Depending on whether your event is public or private, the structure of the welcome box varies:
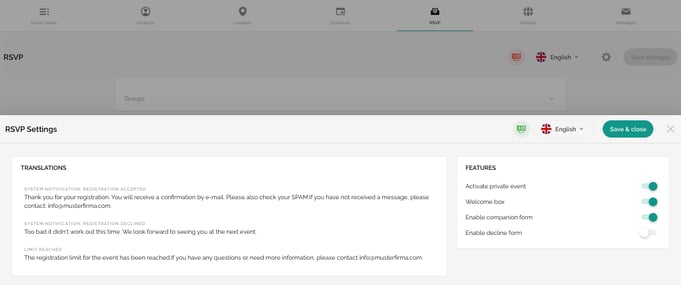
- In the case of a private event where a token input is required, the decline button is displayed next to the submit button.
- In the case of an event where the registration form is publicly accessible on your website, the decline button is omitted.
Further information
In case of a public event, only the submit/registration button appears for interested participants. The logic is that an interested participant who only clicks on the link to receive further information about a publicly accessible event, but then does not want to participate in the event, will not enter all their data in the registration form and click on "Decline". In other words, only a participant who is really interested in the event will click on "Submit/Register" and enter his or her data.
Advice:
We recommend that you add a button "Change registration/deregister" in the registration confirmation message and place the placeholder [[event.register]] behind it. If a participant now clicks on this button to change his or her registration, the registration form will also display the decline/deregister button.
To display the box on your website, activate the button behind "Welcome box". To do this, click on the cogwheel.
The following editing options are now available in the mask that opens:

- Add a description text and vary, for example, between different font sizes, set links or add documents by inserting them behind links
Attention!
For security reasons, some content can not be displayed in edit mode in the site builder. For example, externally embedded images are displayed as broken images and externally embedded fonts might not be displayed correctly. However, all content can be accessed and used via the preview button and the published website.
- Define the name of the decline and register buttons.
Attention!
Please note that the order of the buttons must not be changed, as the underlying logic of the register and decline/deregister button is not adapted by the renaming. In other words, please do not rename the "Submit" button to the "Decline" button and vice versa.
If a contact clicks on "Decline", the corresponding system notification is automatically displayed and the unsubscribe confirmation (e-mail) is triggered. The basic requirement is that you have set this up correctly under your Messages. How to adjust the text for the system notification is described HERE. At the same time, the status of this contact in the contact list changes and it is marked as "Declined".
If a contact wants to take part in your event and clicks on "Register", the registration form you set up opens. How to define the corresponding contact information and additional questions is described in these articles:
Please note:
A personalised address via a placeholder is not possible yet.
Next step: Request personal information.