
With the help of our evenito badge printing function you have the possibility to print personalized files for different use cases, such as the personalisation of name badges for your participants, directly from the evenito back office.
In this article
Activate personalized file function
Note:
This module is an additional function that is not available in the basic setup of evenito. Please get in touch with your sales contact or the Customer Success Team if you are interested in this function and would like more information on how to activate it.
Create your personalized file
Before you can personalise your file, you must first create a document. For this purpose, you set up a Word file in which you insert your texts, images, logos, etc. and specify the desired format.
Please note:
Your document must be created in the same format in which you want to print it in the end.
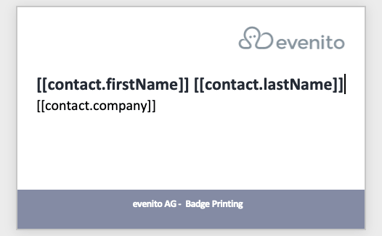
In order to have this document personalised, it requires appropriate placeholders that are automatically filled with the participant's personal information when the file is printed or sent. You can use these placeholders to design an address field, insert the salutation, or the personalised QR code, for example.
If desired, tables can be used in the files to bring structure to the document. It is also possible to hide table rows so that they are not displayed in the final document.
Please note:
Only the base fonts, such as Arial, should be used to create the Word document. Since the personalized files cannot map every font, it will be automatically adjusted to a base font in the background otherwise.
Please also note that the placeholders in a file will not work if you embed them in the header, footer or a text field, for example.
Placeholders in personalized files
You can use the following placeholders in your Word document:
- Event start date:
[[event.startDateWithDay]]
- Event start time:
[[event.startTime]]
- Event name:
[[event.name]]
- Description Event:
[[event.description]]
- Main location of the event (name and address):
[[event.location]]
- Salutation:
[[contact.greeting]]
- Title:
[[contact.titel]]
- First name:
[[contact.firstName]]
- Last name:
[[contact.lastName]]
- Address:
[[contact.address]]
- Postcode:
[[contact.zip]]
- Place:
[[contact.city]]
- Individual token:
[[contact.token]]
- QR-Code for Check-In:
[[images.qrcode]]
- QR-Code for the personalized registration on the event website:
[[images.registerQr]]
- QR-Code for the personalized access to the virtual platform:
[[images.connectUrlQr]]
Please note:
You also have the option of using all the contact information fields and additional questions created for your registration form as placeholders in your personalised file. You can find them in your placeholder manager under "Contact information".
Please note:
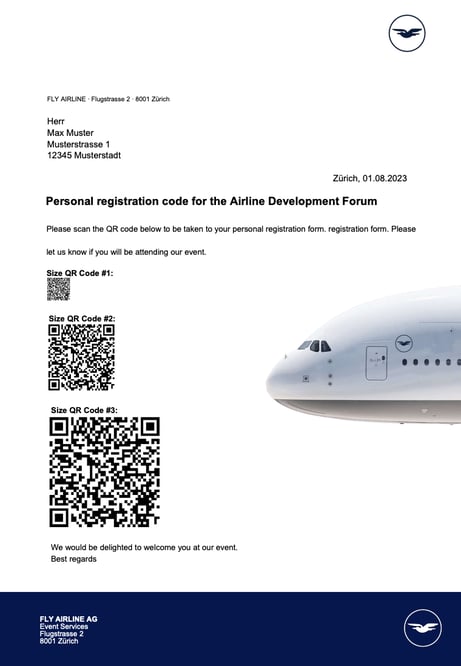
Vary the size of your QR codes by choosing between the following height and width variants (using the example of the QR code for personal registration on the event website):
[[images.registerQr width=1,height=1]]
[[images.registerQr width=3,height=3]]
[[images.registerQr width=5,height=5]]
Use file
Once you have prepared your file, you can add it to your event.
To do this, go to your contacts, select the "Personalized files" tab and click on the "+" icon on the right.

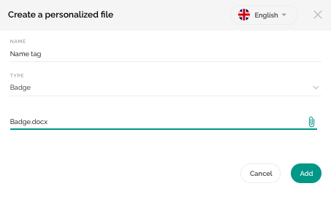
In the window that opens, define the name of your file, select "Badge" in the dropdown under the type and add your file via the file manager by clicking on the paper clip on the right. Then confirm the upload by clicking the "Add" button.
Please note:
In case your event is multilingual, you can use the language switcher in the upper right corner to store the files in different languages. As soon as you download or send the file to your contacts, they will automatically receive the file in the language stored in the contact. If you want to use the same badges for all languages, you only need to store the personalized file in one language. This file will be automatically taken over to all event languages.
Download and dispatch
Download
To download your personalized file, go to your contacts and select the desired participants by checking the top checkbox. Once you have made your contact selection, click on the download button at the top right and select "Personalized files".
Please note:
It is not possible to select individual contacts in the list via different pages. Instead, you have the option to use the filter function ("Show filter") and to create your file only for the registered contacts, for example.

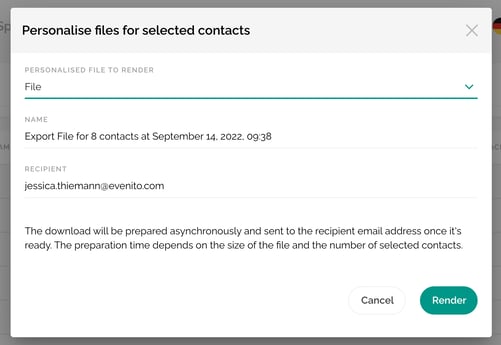
Then select your file from the drop down menu. The following window opens:
Please note:
The file name and the recipient are filled in automatically by the system - by default, the email address with which you log in to evenito is stored as the recipient. Of course, you can also change both manually.
By clicking the "Render" button you confirm the sending of the personalized files to the recipient's email address. The download is prepared with a time delay and the duration of the sending depends on the size and number of the selected files and contacts.
The link to download the files in the e-mail is valid for 7 days from the time of receipt. After this time you will not be able to access the files behind the link and you will have to start a new export.
Of course, you also have the option to download the personalized file for a single contact only. To do this, open the desired contact by hovering over the contact with the cursor and clicking on the edit pen on the right side. Then click on the download button in the upper right corner and select the desired file to trigger the download.

Dispatch
In order to send the file to your participants via message, you must first create a message with which you want to send it.
Insert a button in the message for the link to the file and store the placeholder of the file in the URL. Alternatively, you can also link the placeholder behind a sentence or word, or provide it as a link to copy out of the message.
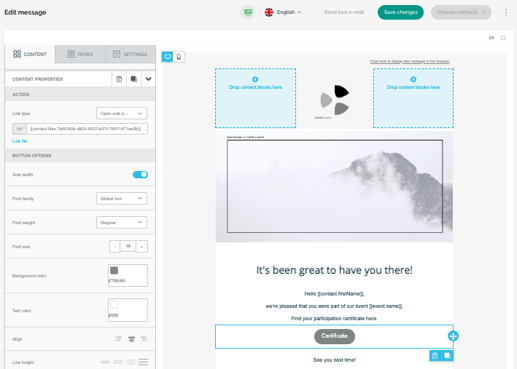
In the placeholder manager, under the "Files" section, you'll find the corresponding placeholders for the file. There are two different options available. The first placeholder (here, for example, "Test File") pertains to the personalized file of the main contact. The second placeholder (+ Companions) automatically includes both files, meaning that the personalized files for both contacts (main contact + companion) are included.

After you have finished editing, you can now send your message to the desired contacts.
Note:
If the placeholder "File name" (+ Companions) is used in a message, the file can only be provided after the regular dispatch. No file is provided if the message is sent as a test message.
Please note:
If multiple files need to be rendered, a notification will appear indicating that the document is being prepared. The page will then need to be refreshed in order to access the complete document. After refreshing, the document will be available immediately.
Please also note that the document will only be available for 7 days after the message is sent. If the recipient does not download the file within this timeframe, the link will expire and the message will need to be resent.
Print badges
You want to print most of your badges before the event starts? Then please proceed as described in the download section of this article by downloading your personalized badges in order to print them collectively.
You also have the possibility to print badges via the evenito backoffice.
Please note:
We recommend that you print large quantities of badges before the actual event start and use the function from the back office only for individual cases or short term check ins on site.
To check in your contacts via the back office and print them a personalized badge, enable this feature in the basic settings of your Event Center by activating the switch on the right side under "Check in".

Then click on the menu item "Check in" in the upper right corner of your navigation bar.
To be able to print badges for individual participants, please activate the "Badge printing" button at the top right.

Please note:
The function remains activated until you either switch it off again manually, exit the menu item "Check in" or refresh your browser tab.
Now call up your desired contact by clicking on it on the left side in your contact overview. You also have the option to search by first or last name, or to use the filter function, for example, to display only certain groups that you want to accredit on site.
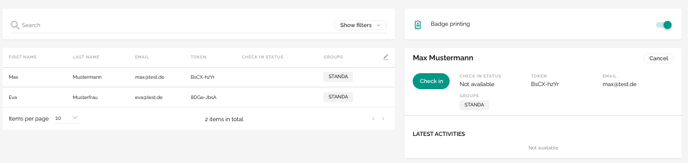
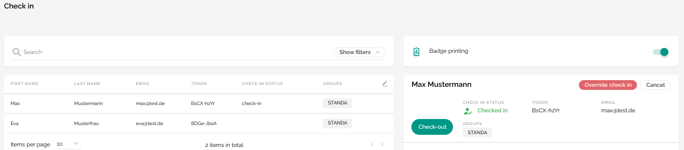
Then click on the "Check in" button on the right and your contact will be checked in.
The following message will appear:

If you have stored several personalized badge files, all files are always prepared for printing in the first step. You can then manually decide in the print preview which of the badges you want to print for this contact.
You will then be taken directly to the print preview and can decide here which files exactly and on which device you want to print them.
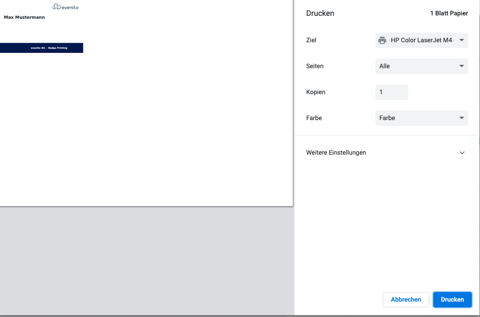
Confirm the process by clicking on "Print".
Your desired badge will now be printed on your selected hardware.
If you need a badge more than once, click on the red button "Override check in" on the right side and the printing process will be triggered again.
Hardware
Principally any hardware that your computer or laptop has access to will work for printing your badges.
Please make sure that your hardware also meets the requirements for your desired badge printing, such as printing in a certain format, or on a certain type of paper.
Connect the hardware in the print settings of your device so that it can be selected directly in the print preview in the evenito backoffice.
To use the Badge Printing function, the corresponding browsers must run at least on these versions:
- Chrome 111.0
- Firefox 111.0
- Edge 111.0
- Safari: Not supported
Please note:
For security reasons, we recommend that you always update your browser to the latest version.