
evenito allows you to define the information fields of your contacts that are relevant for your event. You can (re)name the contact fields, store their requirements and if necessary, define individual values for your columns.
In this article
Contacts settings
Open the settings via the gear wheel ![]() to edit your contact fields. In the “Personal” tab, you can view the contact fields you have created and in the “Question” tab, the additional questions created in the registration form are displayed.
to edit your contact fields. In the “Personal” tab, you can view the contact fields you have created and in the “Question” tab, the additional questions created in the registration form are displayed.


Please note:
Please note that some of the following settings are independent of the registration form. They help you (as an event organiser) to keep track of your contact list and make sure it is complete. If you want to set up your registration form, the following article will help you: RSVP.
Add contact fields
Once the window has opened, you can add the predefined contact fields at the top right. Search for the desired field in the dropdown or use the keyword search. To add the desired field, click on it. It will then automatically appear in the overview under "Edit contact list columns".
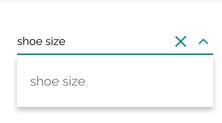
If you want to add a custom field, enter the desired name (example: shoe size) of the field in the search at the top right and add it by clicking on the newly created field in the overview.
As soon as you have added all your fields, you can further define them in the bottom part.
Please note:
The listed additional questions, which you have set up in the menu item "RSVP", are listed again in the overview of the contact settings. Here you have the option of adjusting both the title of the question and the corresponding answer options. However, new questions cannot be created here. We recommend that you always edit your additional questions directly in the menu item "Registration".
Edit contact fields
Move the cursor over the desired field for further editing. The following editing options appear on the right-hand side:

First define whether the field is required or optional. To change the setting, select the button "set as required". If you mark a contact information as required, the font colour in the overview changes to red.
Please note:
Please note: the setting of the required field is not automatically applied to the registration form. The setting only defines whether the information must be stored in a contact (by the event organiser) when creating a new contact. Your additional questions cannot be marked as "required" at this point, as this would cause difficulties when uploading your Excel file.
Click on the icon ![]() to change the name of the field.
to change the name of the field.
Attention!
Not every field may be renamed or misused. It is important, for example, that you do not use the predefined field "E-mail" for something else, as every e-mail is sent to this contact information.
Please note:
Please note that after changing the setting, you save it by selecting the check mark.
You can define further settings per field by using the cogwheel symbol ![]() .
.

The following field type options are available:
- Short text: freely definable short text
- Long text: freely definable long text
- Phone number: this answer type validates the format of the phone number based on the selected country.
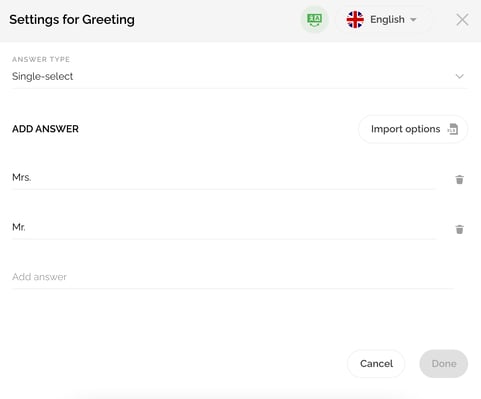
- Single-select: You can already define the contents of the selection. For this purpose, answer fields are displayed in the lower area in which you can enter the possible values. The contact can only use one of the defined answers. For example, see Greeting: only one of these answers can be selected for the contact (in the backend by you as the event organiser) or by the contact himself (in the registration form on the website).
- Multi-select: compared to Single-select, this contact field allows multiple answers/content to be selected.
Please note:
You can upload an Excel list with values via the "Import options" button. This is useful, for example, when uploading all countries. Please make sure that the values are translated in all your stored event languages before you upload them, as you have to assign a column to each language. Only in this way can you ensure that the options are also listed in the dropdown in all languages.
The respective definition of the type is displayed in the overview next to the field name.
In addition, you also have the option here to define whether the field is optional or required. With this you decide, what fields have to be filled with content mandatory when creating a contact manually or when uploading an Excel list.
Your stored fields are displayed by default in the contact overview.
For multilingual events, you can translate all your created contact information fields into all specified event languages via the language switcher. The language wizard can help you with this. You can find detailed information about it in this article.
Of course, you can remove a field at any time using the trash can icon ![]() .
.
Please note:
The contact information fields first name, last name and email address cannot be removed from the overview, as important components in evenito rely on this information.
This symbol allows you to change the order of the fields. You can move the field to any position by dragging and dropping = .
As soon as you have defined your relevant contact fields, you can save them using the "Save & close" button. The stored fields are now displayed in your overview.
Please note:
- The contact fields are not automatically transferred to the RSVP. Instead, they are available for selection in the "Add item" dropdown in the "Contact information" area.
- For multilingual events, it is important to check that all fields and answer options are translated. You can switch the language using the language changer in the top right-hand corner.
Next step: Import contacts